| you
are here: home>
physics>
lesson 18 |
 |
| |
|
|
 |
| Teachers' notes |
| |
| The lesson
may be spread over two sessions |
| |
Starter:
Introduction to crumple zones as safety devices:
How Do Crumple Zones
Work?
|
Crumple
zones are deliberate weak spots that engineers have
placed in the structure of a car. This sounds a
bit weird but there are sound and simple principles
behind the approach.
By placing the weak spots in strategic locations,
the metal work of a car can be made to collapse
in a controlled manner. This creates two mechanisms
by which the energy from an impact can be managed: |
| 1. |
In deforming
the metal work of the car, some of the energy
from the impact gets transferred into heat.
This reduces the amount of energy left to
damage the passenger area. |
| 2. |
Since the collapse
is controlled, energy from the impact can
be directed away from the passenger area.
In most designs, force from the impact is
channelled to areas such as the floor, bulkhead,
sills, roof and bonnet. |
|
| Force
On The Passenger |
To understand
how crumple zones affect passengers, consider a
car crashing head-on into a stationary concrete
wall. Before the crash, the car and its passengers
move together at the same speed. If the car has
a rigid body, an impact will cause both the car
and passengers to come to a stop in a split second.
It is this rapid deceleration that causes injuries
and fatalities in a car crash. The force acting
on the passengers is given by Newton's 2nd law: |
| |
| Force
= mass x acceleration |
| |
| or |
| |
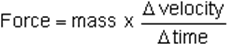 |
| |
As the stopping time
is only a split second, the force on the passengers
is very high.
Cars with crumple zones, however, do not have a
rigid body. You can think of them as a spring being
compressed against a wall. Although the front bumper
of the car immediately becomes stationary, it takes
some time for the metal work to collapse. This allows
the middle and rear of the car to continue in motion
for a short time.
Since the stopping time is increased, the acceleration
is decreased and so the force acting on the passengers
is reduced greatly. |
| |
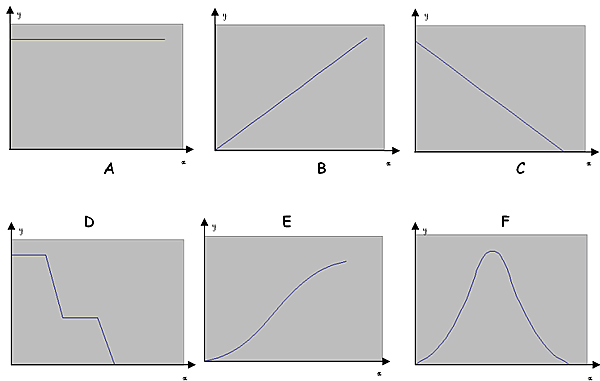
| Starter |
Reading
graphs (5 – 10 mins)
Students are asked to describe what a series of
simple graphs show.
For lower ability students the teacher could add
some X and Y axis labels (e.g. distance and time,
or comedy ones like number of drinks and visits
to the toilet). The teacher could lead a group discussion.
For higher ability students the teacher could ask
them to apply their own labels for the X and Y axes
and decide what the graph is saying. |
| |
 |
| |
| Extra points to be drawn
from the graphs could include what the gradient
of the line could mean, and what the difference
in gradient could imply. |
| |
| Looking at
collisions (10 – 15 mins) |
| F
= m x a |
| |
Students
are reminded of the equation. The teacher could
explain the effects of an object’s mass and acceleration
on the forces it experiences (e.g. large masses
lead to lower accelerations. The object requires
a larger force to maintain its acceleration. Large
accelerations require large forces, etc…)
The main point from this part of the lesson is for
the students to understand the idea that large accelerations
or decelerations lead to large forces.
This can be illustrated by imagining an F1 racing
car and the forces the driver experiences as he
accelerates, or by using the case of a fighter pilot.
(Large G-forces caused by large accelerations.)
Questions on F = m x a, to help consolidate? |
| |
| 1)
|
A force of 1000N is applied to push a mass
of 500kg. How quickly does it accelerate? |
| 2) |
A force of 3000N acts on a
car to make it accelerate by 1.5m/s².
How heavy is the car? |
| 3) |
A car accelerates at a rate
of 5m/s². If it weighs 500kg how much
driving force is the engine applying? |
| 4) |
A force of 10N is applied by
a boy while lifting a 20kg mass. How much
does it accelerate by? |
|
| |
| prev
| next |